Making Spark Effect Using Unity’s Particle System
Today’s topic is creating the spark effect, which is commonly considered the “Hello World!” project of visual effects, using the Unity game engine. In order to follow along with this article, you should at least be able to navigate basic editor interfaces such as the Hierarchy and Inspector. Even if you don’t know the editor at all, you can understand it easily by experimenting a little.
1) Creating the Material
- After creating our URP project in Unity,
- Right-click your project’s Assets folder → Create → Material to create a new material.
- With the material selected, change its shader in the Inspector window to: Universal Render Pipeline → Particles → Unlit
- Set the Surface Type to Transparent, and assign Beam01 (created in Photoshop) or Unity’s default Default-Particle into the Base Map slot.
- Enable the Emission checkbox, choose an orange-ish color, and set the Intensity value to around 4.
2) Creating the Particle System
- Right-click in the Hierarchy panel → Effects → Particle System to create a Particle System.
- Select the Particle System from the Hierarchy and start modifying the Particle System component in the Inspector.
Renderer
- First, expand the Renderer section at the bottom of the system.
- Set:
- Render Mode: Stretched Billboard
- Length Scale: 0
- Speed Scale: 0.1
- This allows the particles to stretch based on their speed.
- Assign the previously created Beam01 material to the Material field.
Particle System Adjustments
- We can now start configuring the particle system.
- Set Start Lifetime to Random Between Two Constants with values 1 and 2. Lifetime controls how long each particle lives, and this setting gives every particle a random value between 1 and 2, resulting in a more natural look.
- Set Start Speed to Random Between Two Constants with values 4 and 6.
- Set Start Size to Random Between Two Constants with values 0.1 and 0.05.
- Set Gravity Modifier to 1 so the particles will be affected by gravity.
- Set Simulation Space to World. This allows particles to move independently of the particle system’s transform.
Emission, Shape, Size over Lifetime, Color over Lifetime
- Expand Emission and set Rate over Time to 50. This will produce 50 particles per second.
- In the Shape category, leave the shape as Cone, but set Radius to the lowest possible value and set Angle to 15.
Color over Lifetime
- Click the gradient bar to open the gradient editor.
- On the right side of the gradient, set the alpha value to zero and add a key at the 75% mark with full alpha.
Size over Lifetime
- Set Size to Curve, then click the curve to open the curve editor.
- Create a decreasing curve as shown in the image.
Collision
- Expand the Collision category.
- Set Type to World.
- Dampen reduces the particle’s speed.
- Bounce determines how much the particle will bounce when it hits the ground.
- Lifetime Loss determines how much of the particle’s remaining life is lost upon collision.
- Using this information, set:
- Dampen: 0.5
- Bounce: 0.5
- Lifetime Loss: 0.1
Final Touches
- Add Volume → Global Volume to the scene through the Hierarchy, and create a new volume. Inside this volume, add Post-Process Effects.
- Add Bloom and set Threshold to 1, Intensity to 1.2. This should be enough to make the spark effect glow.
- I will add a few more effects to decorate my scene a bit more.
Result
Now we have a ready-to-use VFX. By experimenting with the effect we created in this article, you can produce different variations as well — for example, a purple and stylized spark. Unity is an incredibly flexible game engine and is used in many areas beyond games. In the field of visual effects, we experimented with Unity’s Particle System solution rather than VFX Graph. I hope the result makes you happy.
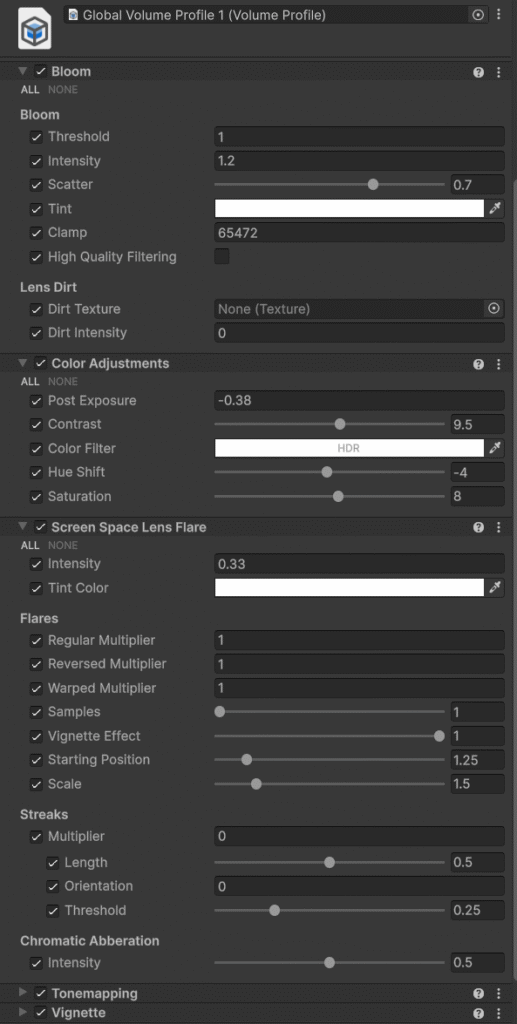
The Myth of “Bad Unity Graphics”